Using Claude to reverse engineer my Divoom Ditoo
Creating a weather reporter for the Divoom Ditoo by reverse engineering its Bluetooth protocol with Claude.
Divoom Ditoo Weather Reporter#
For my birthday last year I received a Divoom Ditoo, a tiny retro RGB computer with a 16x16 pixel screen. The Ditoo is designed to sit on your desk as a mini device that can arcade play games, watch animations and listen to music. The unboxing of it was an experience in itself. It came in a sturdy fridge-like container, and taking it out of its box for the first time really made me respect the relatively hefty price point ↗. It’s beautifully designed, weighty, and feels like a premium piece of tech. It is so unnecessary, but that is its appeal, it is there just to make you smile.
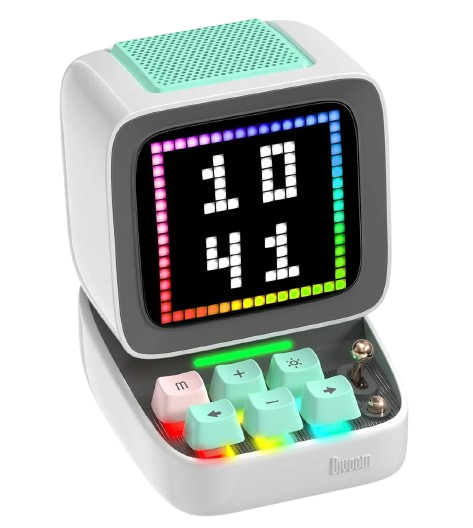
My interest in it was the animations that it could show. I enjoy the charm of pixel art, and it’s impressive what some creatives can do with just 256 pixels. However, to do any personalisation of what the device shows, the app must be downloaded, an account must be made, the Ditoo must be connected, and your phone must be in your hand. For that reason, its primary use for me since I got it has been an expensive desk clock. I didn’t really fancy getting my phone out every time I want to change the animation.
Then one day I had a thought. I could get something running on my Raspberry Pi to control it programmatically and avoid using their app entirely. I first looked for an officially sanctioned API from Divoom, with no luck, their app is proprietary, the firmware is closed, and there’s no published protocol or packet reference anywhere. Thankfully I wasn’t the only person who’d had this idea, and I came across plenty of people who’d attempted, or actually succeeded, at doing exactly this.
Reverse Engineering with Claude#
The only documentation of how things should be sent has been deciphered by people spying on the Bluetooth data their phones send when using the app. The first blog I read was someone doing just that ↗: they used an Android phone with Bluetooth logging enabled, monitored what got sent as they tapped through different options, and used that to reverse engineer the structure of data required for each action. There are repos in various languages that implement this protocol, and even a seemingly fully fledged protocol document ↗.
The Rust implementation ↗ seemed the most promising, but before blindly trusting it, I got it running locally to verify it did what it claimed.
Rather than me reading each source linearly, or performing the bluetooth sniffing myself, I could quickly leverage those who went before me to understand how these packets are actually constructed. Once we could distill all of the implementation details, what we would end up with was the raw bytes, which was always going to be the same across approaches and methods. I decided to utilise Claude projects to reverse engineer the reverse engineering to cook something up in Python.
I extracted and downloaded all of these repos, documentation and articles and fed them to a newly created Claude Code project. Dropping in different source material, different approaches, language implementations of the same protocols, gives Claude enough meat and bones to cross check itself.
I did not just simply dump the resources into a project, I first did research on how best to maximise the outcomes when using Claude projects. I renamed the resources to something clear and descriptive, which I then referenced in the project’s instructions. I explained in the instructions I was reverse engineering a protocol in Python, I mentioned how the actions I wanted to perform were successfully accomplished by the Rust implementation and also that the protocol doc is an unofficial community maintained protocol and may be incomplete or incorrect. This helps Claude prioritise sources and not treat them as equally authoritative.
Bluetooth Types#
I started by asking Claude to explain from a high level how these packets were sent which led me down a bluetooth crash course.
Bluetooth actually comes in two flavours: Classic Bluetooth (built for continuous data streams like audio or serial connections) and BLE (Bluetooth Low Energy, built for small, infrequent bursts of data from battery-powered gadgets like fitness trackers). The Ditoo Pro Light uses Classic. Each OS exposes this differently: I’m on Linux, where pairing is handled by bluetoothctl and a socket is used for the actual data. macOS and Windows both support Classic Bluetooth too, but the tooling and APIs differ enough that code written for one won’t port cleanly to another.
RFCOMM is Bluetooth’s version of a wired serial port: you open a connection to the device on a specific channel, then just send and receive raw bytes, no services or characteristics, just a dumb pipe over radio instead of copper. Because it’s only a stream of bytes with no message boundaries, it’s up to your own protocol to mark where one command ends and the next begins, which is why the Divoom protocol exists on top of it.
General Packet Construction#
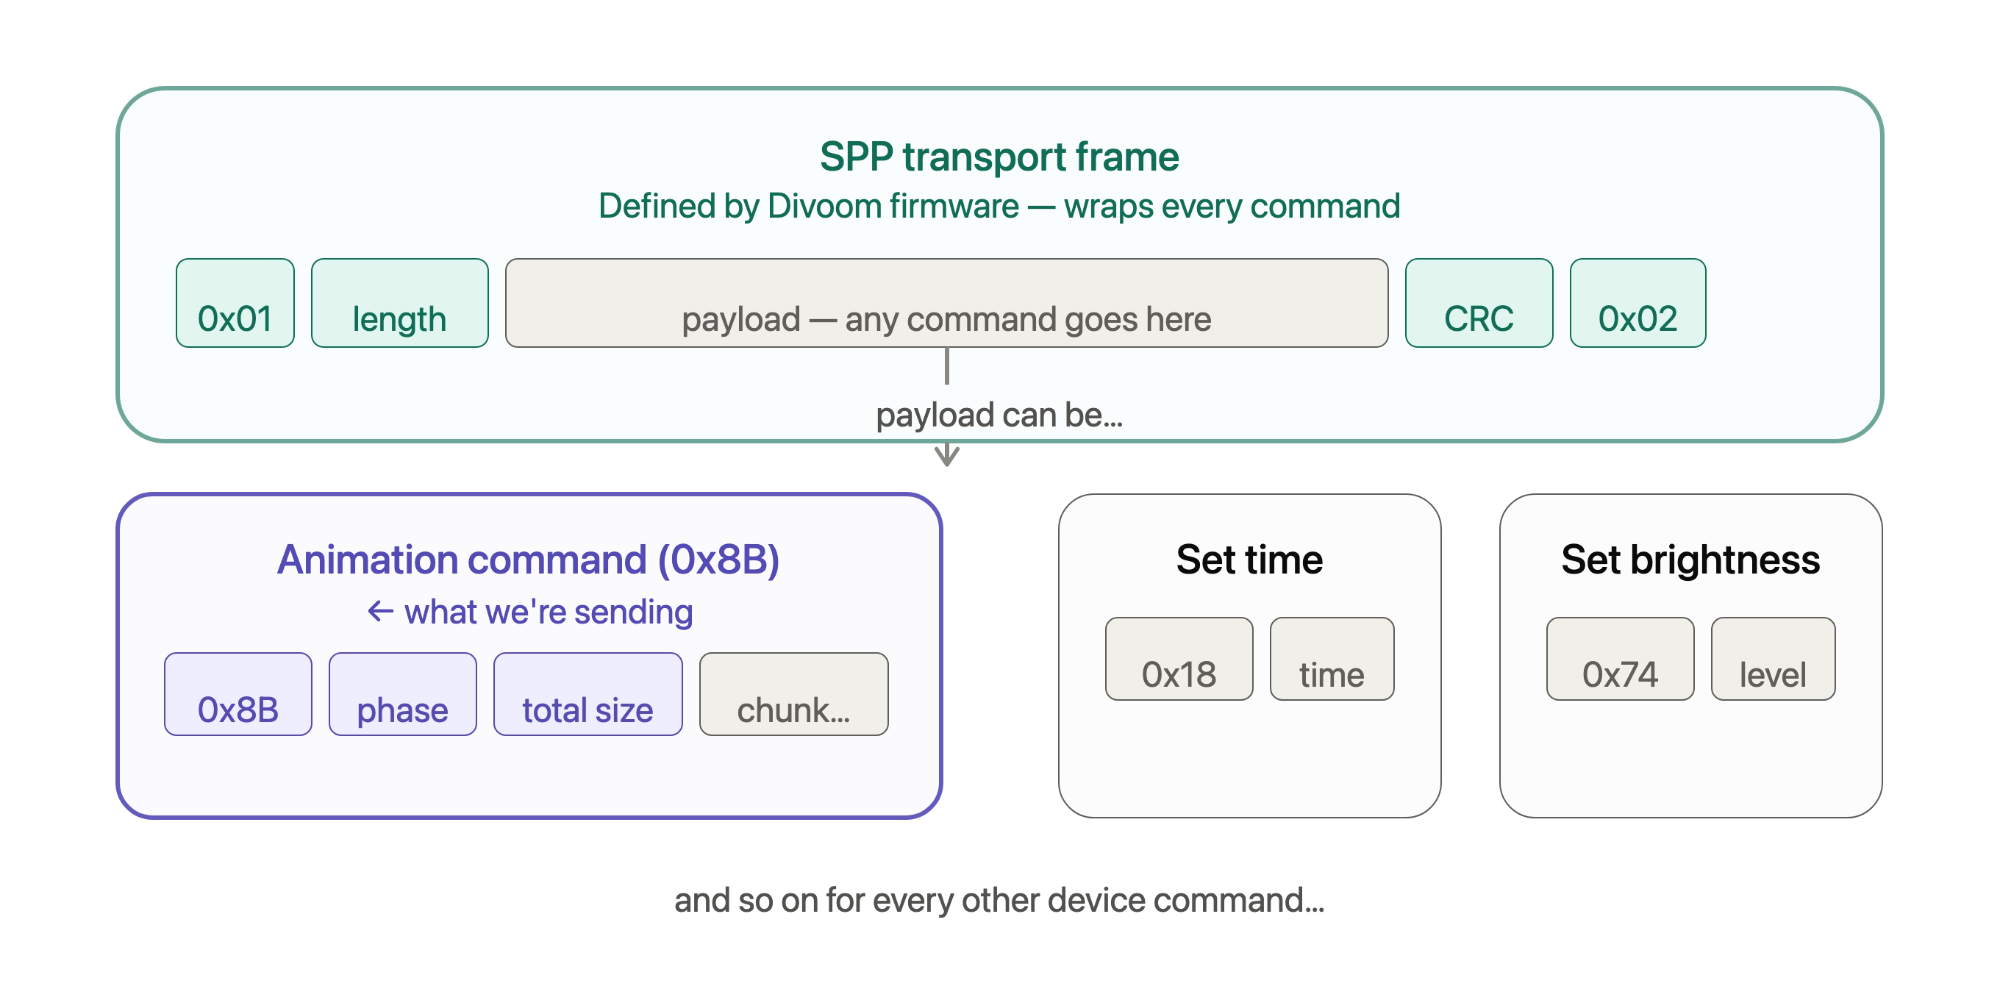
Claude deciphered that the Ditoo expects a binary packet in a very common protocol format, you can think of the payload as being wrapped in an envelope. The envelope has a few important jobs
- The start & end byte (1 byte respectively): These act as a signal to identify the start and end of a message
- The length (2 bytes): Specifies how many bytes follow in the payload, this is constructed by figuring out the length of the payload and adding two to account for the checksum. This is represented as an unsigned little-endian value.
- The checksum (2 bytes): Is a simple error checking value calculated by adding every byte in the length and payload field. The receiver will perform the same calculation and compare the result. If the values differ the packet was likely corrupted. This is represented as an unsigned little-endian value.
[start byte][length][payload][checksum][end byte]If you are interested in how exactly the packets are constructed, this can be found by looking at the code ↗.
Sending Pictures & GIFs#
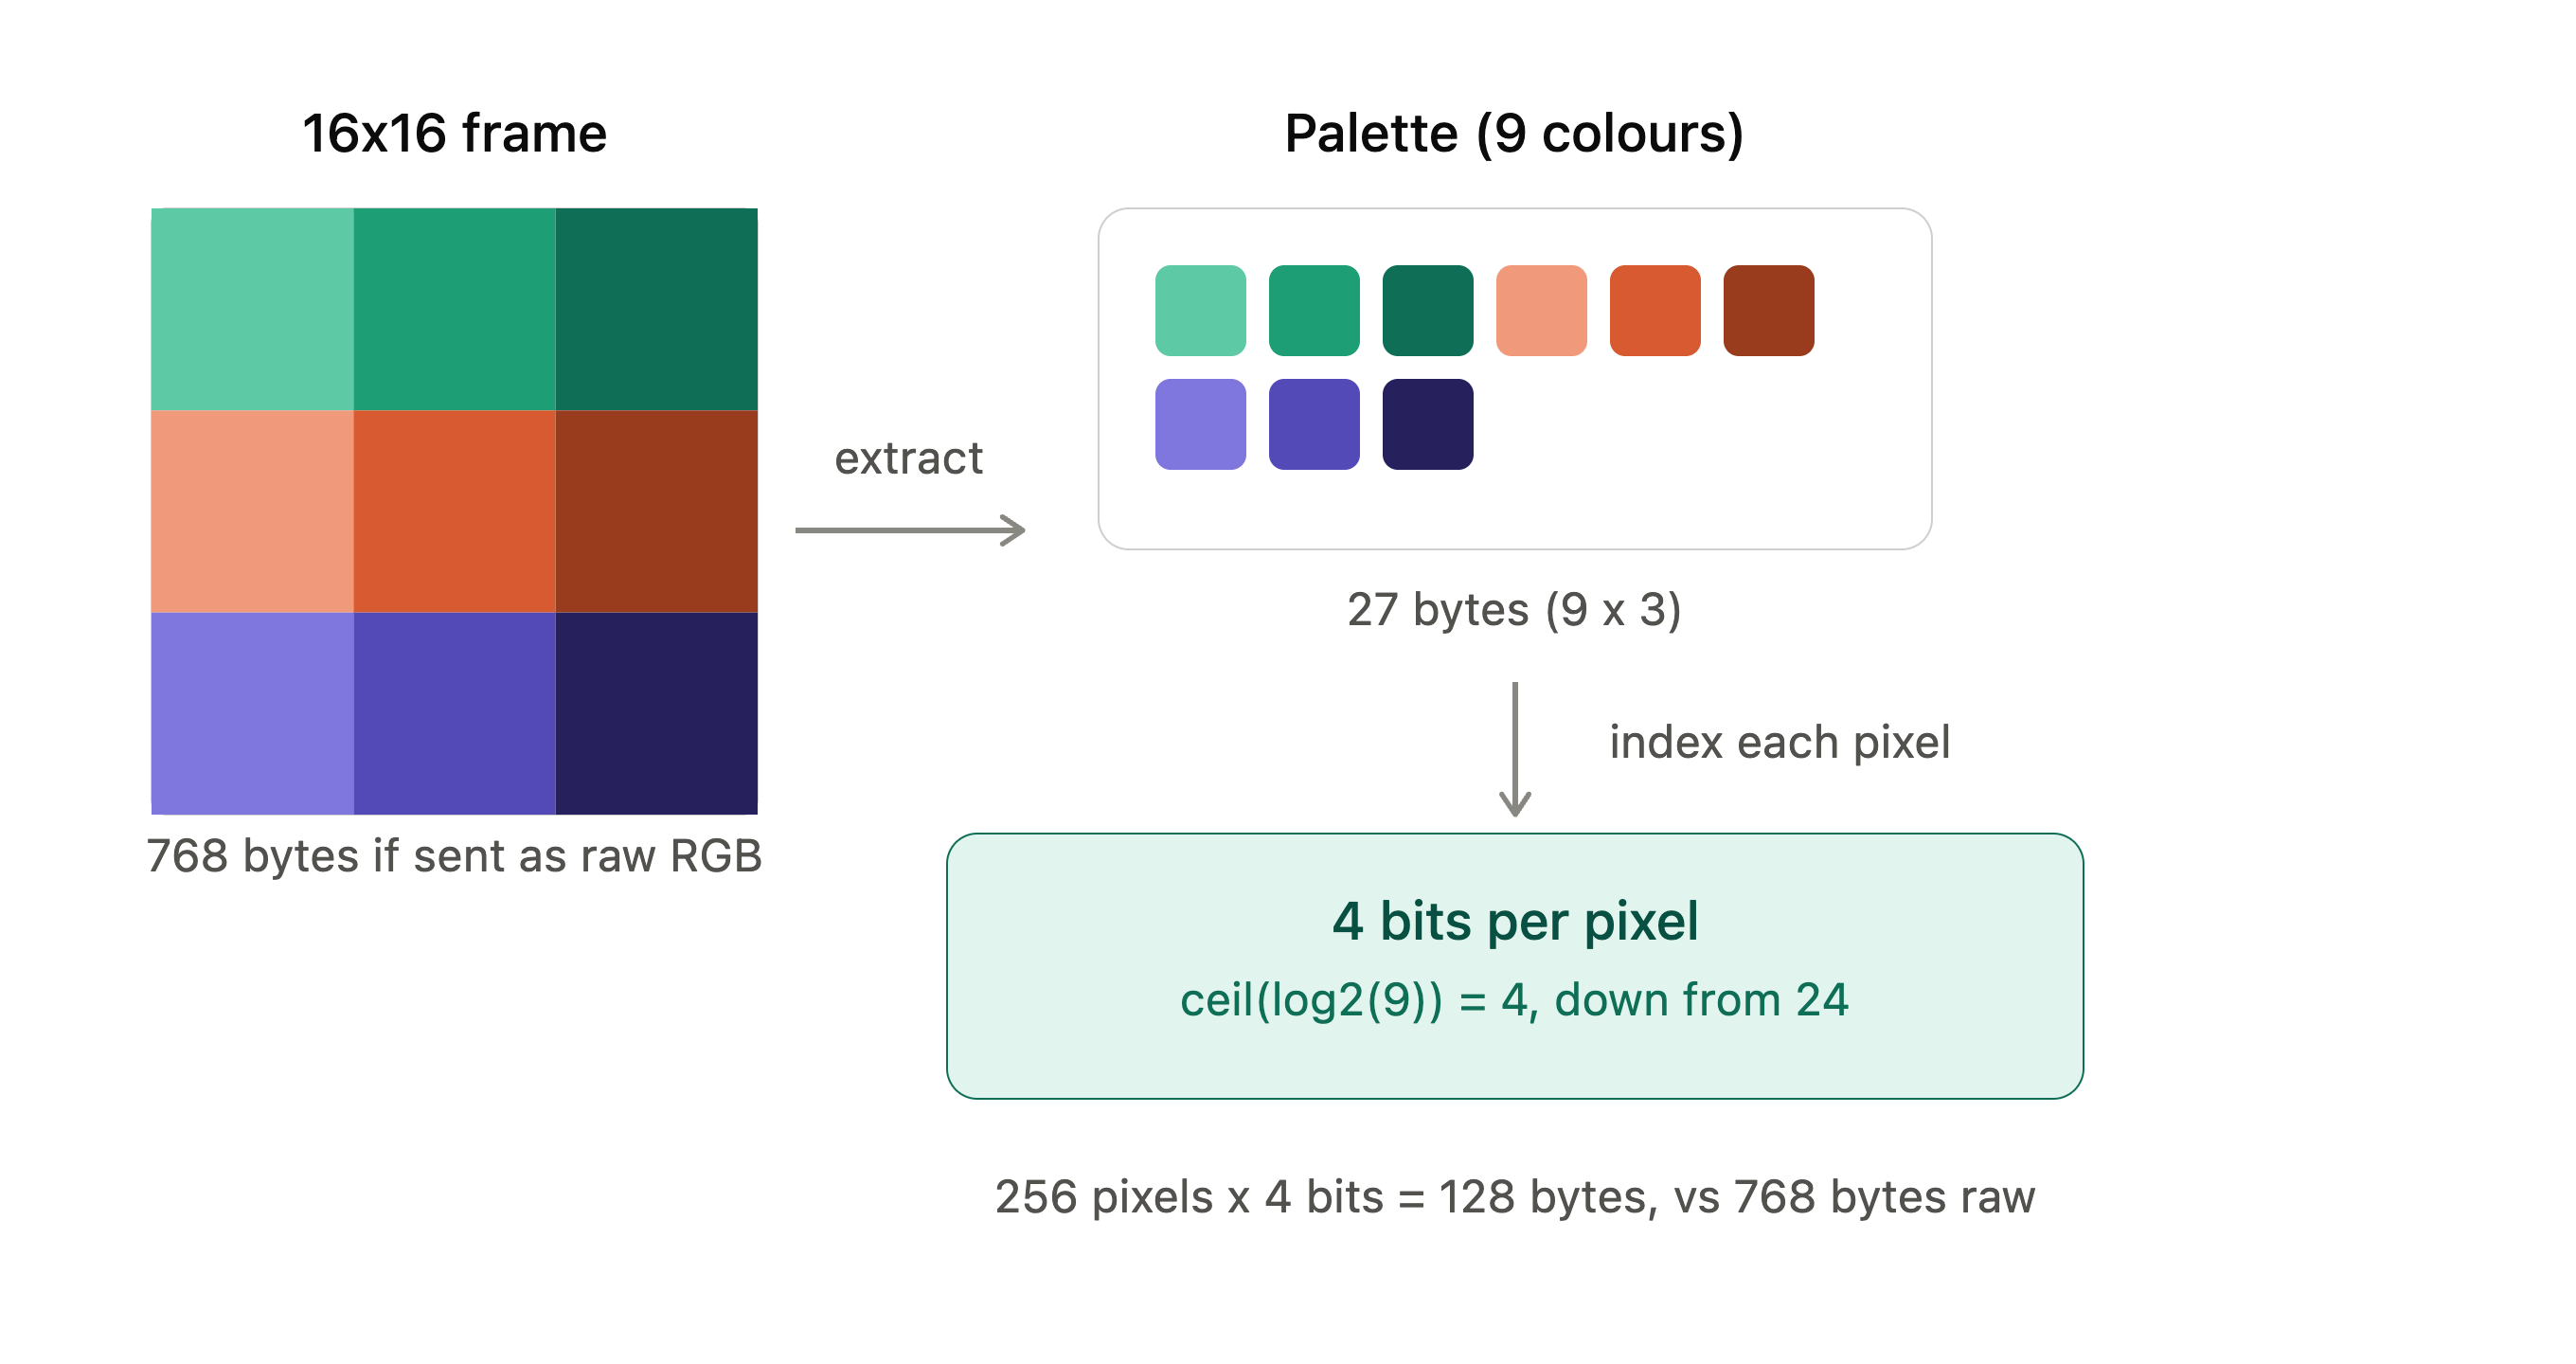
The only thing I really cared about was the ability to send pictures and GIFs. I did not want to decipher the entire protocol myself, but to understand the packet construction post reverse-engineering was interesting to me. Claude disassembled the packet structure for me, and helped me form my mental model, and with that I was able to implement it in Python. I have never worked with image data in the past and naively I thought it would be simply sent as a stream of colours, each colour representing a single pixel. So for a 16×16 display that would be 256 RGB tuples sent, 256 × 3 = 768 bytes of raw pixel data every frame, regardless of what’s on screen.
What actually happens is smarter. Instead of repeating colour values for every pixel, you first extract the unique colours that actually appear in the image into a palette, then store each pixel as just an index into that palette. How many bits that index needs depends entirely on how many unique colours you have, with only 8 colours you need 3 bits per pixel instead of 24 bits, which is an 8× reduction in pixel data alone.
For a typical 16×16 pixel art image with maybe 8–16 colours, this makes a significant difference. The palette itself costs num_colours × 3 bytes, but the pixel data shrinks dramatically. And since the Divoom is a pixel art device with a tiny display, images tend to be simple enough that you rarely approach the 256-colour worst case.
The other thing that surprised me was that you don’t send frames one at a time, all frames are concatenated into a single blob first, then sliced into 256-byte chunks with no regard for frame boundaries, and each chunk is wrapped in a packet. The device reassembles the blob and walks through it frame by frame using the length field embedded in each frame header. That length field, not the packet boundaries, is what tells the device where one frame ends and the next begins.
Deciding What to Display#
For what to display, I had a few different ideas, but it had to be simple, understandable and programmatically available. It also needed to be something that I could find a lot of pixel art on the Divoom app already for. Although I downloaded Pixquare ↗ on my iPad to try my hand at designing pixel art, I quickly realised that my skills lie more with programming it than designing it lol. Thankfully the Divoom app has thousands of artworks that are free to download. I noticed there was plenty of weather related art available, rain, sun, snow etc and this finalised my decision, the Ditoo would be my personal weather machine.
I spent the next few hours searching all potential phrases for all the different categories of weather and downloaded them. I then categorised these gifs into broad categories; cold, rain, storm, sun and horizons (sunset and sunrise) and seasons (spring, autumn etc). In some categories, I was able to further these gifs into more specific categories such as heavy rain and extreme heat.
As I was scouring the app, I found a lot of eye-catching art that was not weather-related, so I was inclined to also include this artwork in my project. These GIFs live in the default folder.
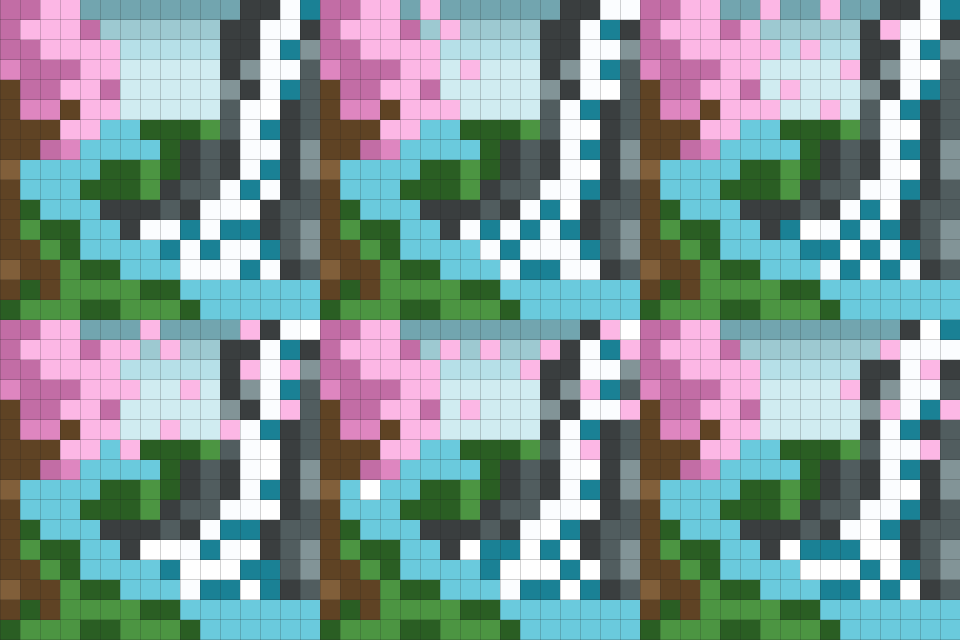
How it worked was simple: every 15 minutes, we would make a call to a free weather API for the current 15 minute forecast at my particular location. We would then use our weather config to determine which category this weather would fall under. For example, you can set your own very hot threshold, mine is set at 28 degrees, anything at this temperature or above would display gifs in the ‘boiling’ folder. For unremarkable weather, which for me is a mild dry day, a GIF from the relevant season would instead be displayed. This weather GIF would be displayed for 60 seconds, preceded by a subtle sound cue. At all other times, we cycle periodically through the default GIFs. All my GIFs can be found here ↗, but they all came from the Divoom app. Here are a few of my favourites:
My Favourite GIFs#
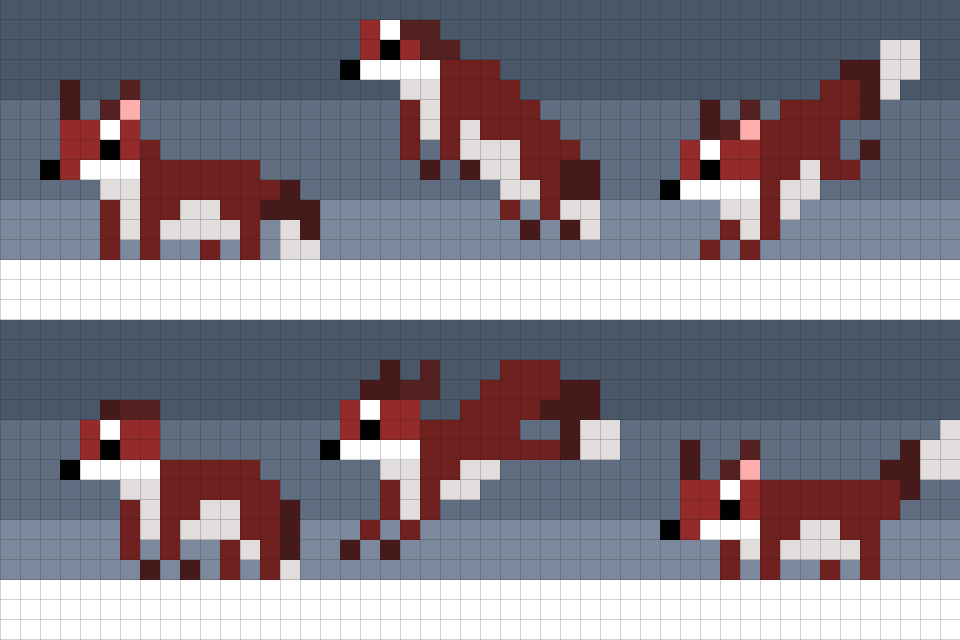
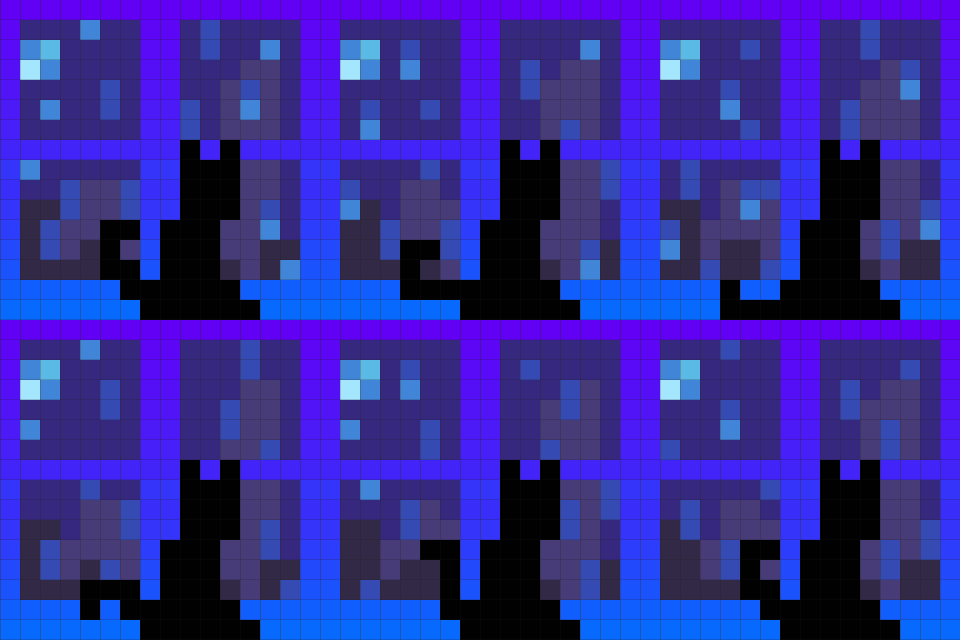
Touching briefly on the sound, this was a relatively simple addition: the Ditoo behaves like any speaker connected via Bluetooth; it supports A2DP (Advanced Audio Distribution Profile) as one of its Bluetooth profiles. It’s the same protocol your phone uses to play music on any Bluetooth speaker or headphones, and the Ditoo behaves like a standard audio sink. So to play sound through the Ditoo, it’s enough to just play audio normally on the connected device.
System Daemon#
Having a script that works when I run it manually is one thing; having something that survives a power cut, a Pi reboot, or a Bluetooth hiccup at 3am is another. I didn’t want to be SSH-ing into the Pi every time it fell over, or whenever my wife unplugged it to plug her straighteners in, so the last piece of the puzzle was making the whole thing run as a proper background service rather than a script I had to babysit.
This is where systemd comes in: Linux’s standard way of managing long-running processes. Rather than leaving a Python script running in a terminal (which dies the moment that terminal closes or the Pi reboots), I wrote a unit file that tells the OS to keep the service alive:
[Unit]
Description=Ditoo Weather Display Daemon
After=bluetooth.target network-online.target
Wants=bluetooth.target network-online.target

[Service]
Type=simple
User=pi
WorkingDirectory=/home/pi/ditoo
ExecStart=/home/pi/ditoo/.venv/bin/python daemon.py
Restart=on-failure
RestartSec=30s
Environment=LOG_LEVEL=INFO
StandardOutput=journal
StandardError=journal

[Install]
WantedBy=multi-user.targetA few things worth explaining:
The daemon needs both Bluetooth and the network to be up before it tries to do anything useful, connect to the Ditoo, poll the weather API, and so on. Wants= is a soft dependency: it tells systemd to try and bring those targets up too. After= is purely about ordering, it tells systemd not to start the daemon until Bluetooth and networking have been reached, but on its own it doesn’t guarantee those targets ever start, which is why it has to be paired with Wants=.
Restart=on-failure with RestartSec=30s is the actual resilience part. If the script crashes, whether that’s a dropped Bluetooth connection, a flaky weather API response, or something I hadn’t anticipated, systemd waits 30 seconds and tries again rather than leaving the display frozen or dark. The delay matters here too; retrying instantly against a Bluetooth adapter that’s still recovering will just fail again immediately.
StandardOutput=journal and StandardError=journal route everything into journalctl instead of into the void or a log file I’d have to remember to rotate. When something does go wrong, journalctl -u ditoo -f gives me a live tail of exactly what the daemon’s doing, which was invaluable while I was getting this up and running.
The systemd file goes in /etc/systemd/system/ditoo.service on the Pi, which is the standard location for custom service units.
Once the unit file is in place, it’s the usual three commands to make it permanent:
sudo systemctl daemon-reload
sudo systemctl enable ditoo
sudo systemctl start ditooAnd that was it, the Pi now boots up, waits for Bluetooth and the network, connects to the Ditoo, and starts cycling through GIFs and polling the weather, with no phone, no app, and no me needed. If it crashes at 3am, it picks itself back up 30 seconds later.
Finally, the expensive desk clock had become useful.